|
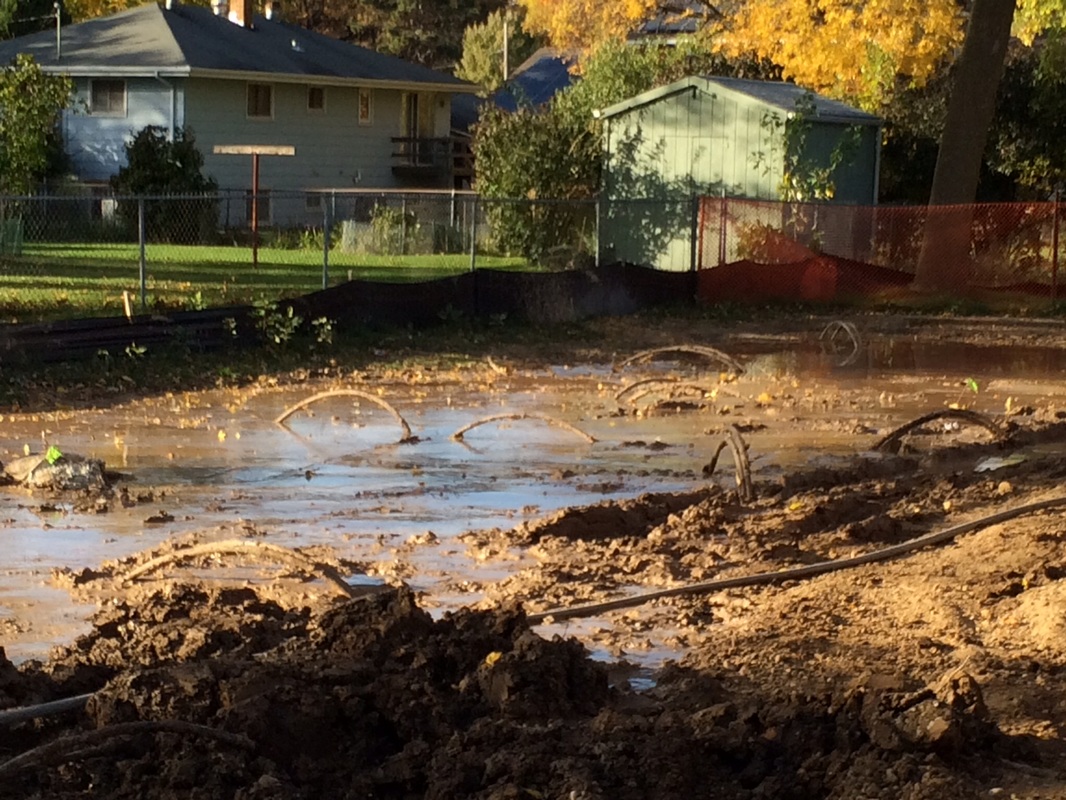
Tis the season for Minnesotans to start layering up for winter, and our house is no different. The foam insulation that was delivered last week was installed downstairs. The edges were then taped or spray foamed for a tight seal. After that was done, our radiant heating tubes were methodically laid out and stapled to the top layer of foam. All of the radiant tubes are gathered in one place in the mechanical room. Until we have walls, they have a temporary 'home' as seen in the second photo. They won't be lonely for long though, as more radiant heating tubes will be going in upstairs. This last week we also had spray foam insulation being applied to nooks and crevices upstairs. Air barriers were also applied to the inside of the walls after the spray foam. Holes have been drilled along the top of the walls, in the house, so the cellulosic insulation can be blown in at a high pressure (for the best long term performance). The guys from Kinzler had recently just finished another net zero home. In that home, they blew in the cellulose at a high pressure prior to the drywall being installed. This is the typical order. The only issue with doing it in this order, they discovered, was that the drywall guys had to get four guys to get each section of the drywall flat against the frame of the wall! They recommended we install the drywall first, so the drywall guys wouldn't send us a lump of coal for Christmas ;-) We happily learned from their experience and agreed that we want this to run as smoothly as possible for everyone, so we will be installing the drywall first, and then blowing in the cellulose. The garage, and the causeway, between the garage and the house, are a different matter though. These areas are not heated and don't have as much insulation. Thus it will be much easier to apply the drywall after the cellulose is blown in. In those areas, they stapled a material over the frame of the walls and blew in the cellulose. I have pictures above of the prepped areas and then the same areas after the blown in insulation. The insulation bulges out a bit, but is easy to push flat. For these areas, the guys cut a hole in the membrane and blew the cellulose in. You can see these in a couple of the photos. Using the tube, they would start at the bottom and work their way back up. Then, move the tube to the top and work their way back again. They were also nice enough to ask me if I wanted to give it a try! Next week, I'll take them up on that when we do some of the insulation in the house. I am very much looking forward to it. I find it very satisfying to play a small role in helping with the house, as long as I can stay out of the way of the experts. Also shown above, is a close-up of the insulation itself. This stuff is wonderful. It is made up, almost completely of recycled content. Recycled newspapers, shredded fabric, even shredded up credit cards. It also does a really good job as insulation. Per inch of thickness it isn't as good an insulator as the spray foam. However, it takes much less energy to make, uses recycled products, and is not toxic (when installing the spray foam the guys wear full body suits and a rebreather). Because it is blown into areas, it doesn't do a great job filling in corners and crevices, which is why we use the expanding spray foam in areas like that. It will expand to fill even the smallest crevice. This is also one of the reasons a simpler exterior wall structure is more environmentally friendly. The more recycled cellulose vs expanding spray foam, the better. On the outside of the house, all those geothermal tubes sticking up out of the ground have now been buried.
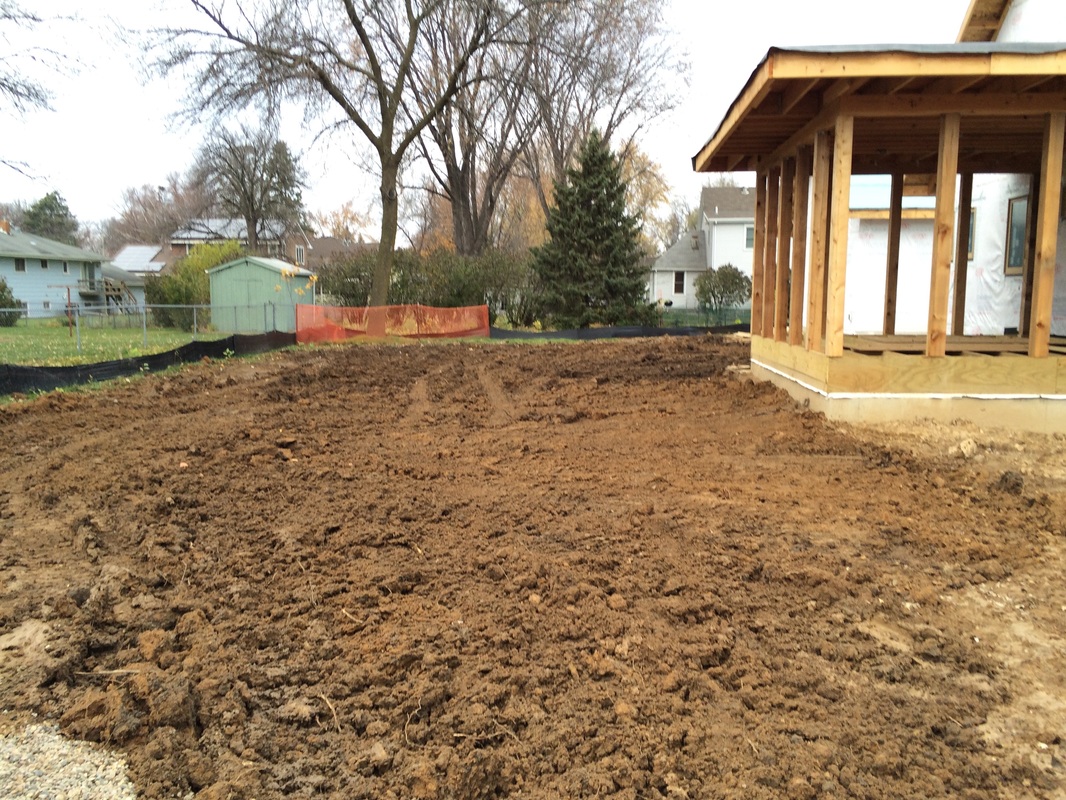
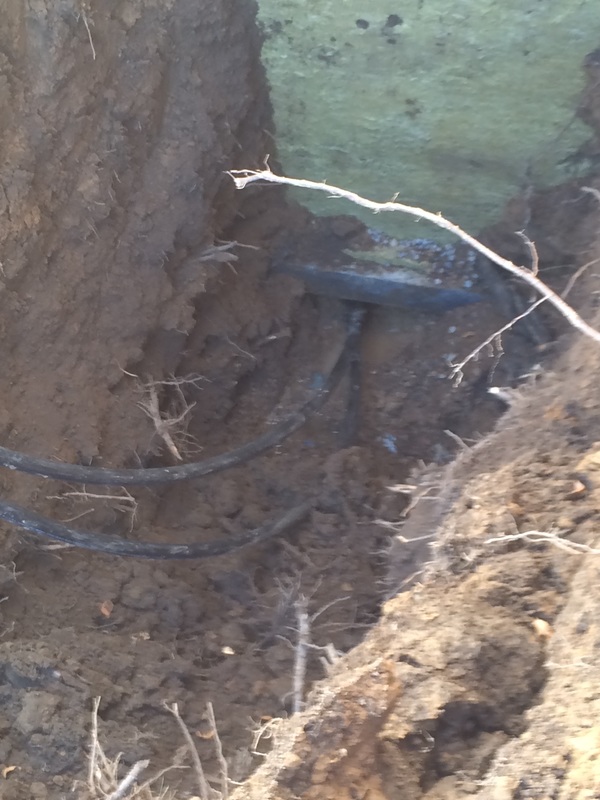
The guys dug down six feet and connected the fourteen, 110 foot wells in seven pairs. Those were then connected to a single return tube which can be seen in the third photo entering the house. Both our domestic hot water and HVAC system run off the geothermal. Rather than separate wells for hot water and HVAC, with a single source, if only one of the two systems are running, it can gather heat from all the wells. At the end of last week, we had a bunch of tubes sticking up through a very sloppy mess. Now, nothing is visible and the back yard, while not exactly pretty, just looks like dirt, rather than a swamp. And then, and I can't exactly explain it, the thing that made me happiest this week happened... The guys poured our cement floor in the basement! Yes, we actually have a floor down there now. It feels soooo much better having a concrete floor rather than rocks. In a couple of the photos you can see the concrete doesn't go all the way to the walls. This was done by placing 2"x4"s along the wall, and then expanded foam inside the wood. The wood will be removed, and the foam cut to be even with the concrete surface (the foam will be removed if it doesn't cut evenly). The gap will then be filled with spray foam (again, for its superior insulation value). We will be polishing the concrete which will act as more thermal mass for us. With the radiant floors, we expect it to be very comfortable down there. Also added to the concrete are devices called "Zip Strips". These basically "encourage" the cracks in the concrete to follow the zip strips. It won't make it crack any faster. But when it does, it will crack where we want it to rather than some random location. Since the polished concrete will be our floor, this is especially important. Much of the path of the cracks will be under walls, or other areas that are less noticeable. I'll try to get some photos of these for next week. Currently, we are planning on a February or March completion date. Earlier we were hoping for January. However, little delays here and there tend to add up and cause other rescheduling issues. While we are very eager for the house to be complete, it is even more important that it be done right. I also do not mind at all, the idea of moving in March rather than January! The garage and causeway will be poured this week (today actually) and lots of other goodies are in store for next week. Let me start by apologizing for the delay in this blog, last week was very, very busy!
I've also heard a few people would like to see more photos, so I am going to start adding more. If anyone reading this has a suggestions please feel free to comment on any of the blogs. The last couple of weeks we have had a number of parts of the house being worked on... The waterproof membrane has been installed on the roof, making it much drier to work inside. The plumbers have roughed in the pipes. There are some fun details to get a little more efficiency out of the house. In the second photo in the gallery above you can see how a 'box' inside the wall was built for the laundry room plumbing. This is behind the sink, where we will never miss the 4 inches of less depth. By not having the plumbing in the wall, it leaves room for insulation. In the third photo, you can see our south wall by the kitchen. Here, we didn't have room for placing the pipes anywhere but in the wall. You can see how the plumbers wrapped the pipes. Around them, we will use a spray foam insulation. The plumbers wrapped the pipes so as the pipes expand (when hot water is running through them) they don't squeak as they rub against insulation. I never thought of that, but for my own sanity, I am very very happy they did! The electrical work has been started. I'm actually helping where I can with this aspect of the house where I can. I am very happy I have been more of a help than a hinderance so far;) Some aspects (a few light fixtures, where switches go, etc) are still getting solidified. There are a ton of decisions and options and it is all a bit overwhelming at times. I have a new appreciation for how wiring a house is as much an art form as a science! We need to be careful to not run wire where the HVAC guys, or other contractors working on stuff in the walls, will need to be running vents, plumbing or other items. Lengthwise, this isn't too big a deal. When cables cross a line of a vent that isn't there yet, extra play in the cable needs to be left to allow the HVAC guys room to work around it without accidentally cutting the wiring. Yet, not too much extra. I was also amazed at the bulk of the wire that is needed. This house is about the average sized American house (2475 sq ft). Yet, added all together, the mass of the wires is many hundreds of pounds. I have a new appreciation of the waste involved in over sized houses. Our last house was far too big for the two of us, so I am very happy we have downsized. The network/low voltage guys also finished their rough in this week. The fourth photo in the gallery above is where the mechanical room will be. The wiring on the left is some of the electrical wiring. The garbage bag hanging on the right is the coiled up networking cabling which will be terminating in the mechanical room as well. The HVAC guys roughed in their cuts for the vents. The heating will all be in-floor radiant heat. The air returns still need holes in the floors, walls, etc. We have a lot of built in cabinets in our house. As such, some of the vents will be in, or through part of the built in cabinets. In the window boxes, we are using a new type of liquid flashing in some areas. It is the white material you can see along the top corner of the window box in the fifth image in the gallery. This fluid flashing is fairly new, it is very useful for complex geometries that are difficult to flash with other "peal and stick" flashings. In the sixth and seventh images you can see another neat trick we are using. The windows are being installed at the inside edge of the window boxes. As the window casings are not the full depth of the wall, where the window ends we are installing a type of siding material. We then wrap the siding (just as you would the outside of the house). The surface is sloped away from the window frame, so water will not sit up against the edge of the window. The roof of the screened in porch was also treated and waterproofed. It will have a gentle slope so we can collect rainwater in one of our rain barrels. In the eighth photo in the gallery you can see our architect up on top of the porch shortly before the waterproofing. He was working on figuring out exactly where the vent from the kitchen exhaust will come out the side of the house. This week, we also had a few bumps in the road. There was some miscommunication about the placement of the window boxes in the main floor of the house. They ended up all two and a half inches too low. When we first heard about this, we were very worried. Chris and Corey, the framers, corrected the height of the windows over just a few days. We are again very thankful that they could respond so quickly and worked over the weekend to correct this. The windows also arrived, YAY! One was the wrong size, BOO! They are almost all in place already, YAY! Two are missing, BOO! It will all be ok, YAY! (just repeat, serenity now, serenity now, serenity now...) This coming week, we have more electrical work, the windows to complete, the geo-thermal wells being drilled in the back yard (underneath a future rain garden) and the boulders for the retaining wall should be delivered. In closing, I want to express my thanks to every one of our contractors, Kerry, our builder with Hage Homes, Marc our architect from SALA. Working onsite as much as I have has given me a better understanding for just how many details there are in building a house, managing many different craftsmen and trades, dealing with bumps in the road, and keeping everything on schedule. I'll also be adding a couple more photos this week before next week's post. I will add them to the gallery above.
Next up, the roof rafters!
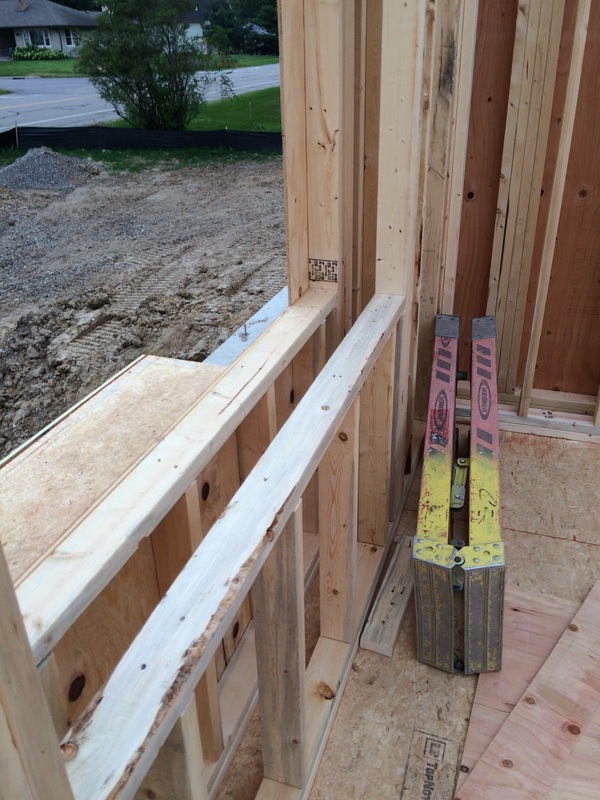
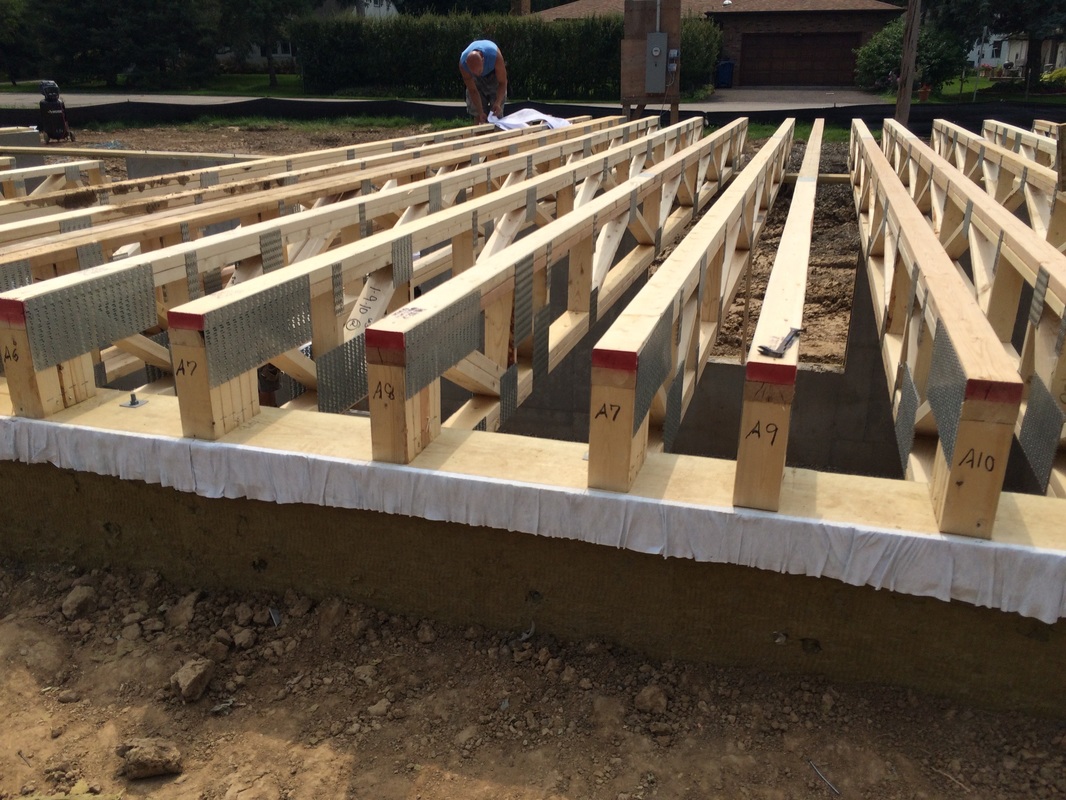
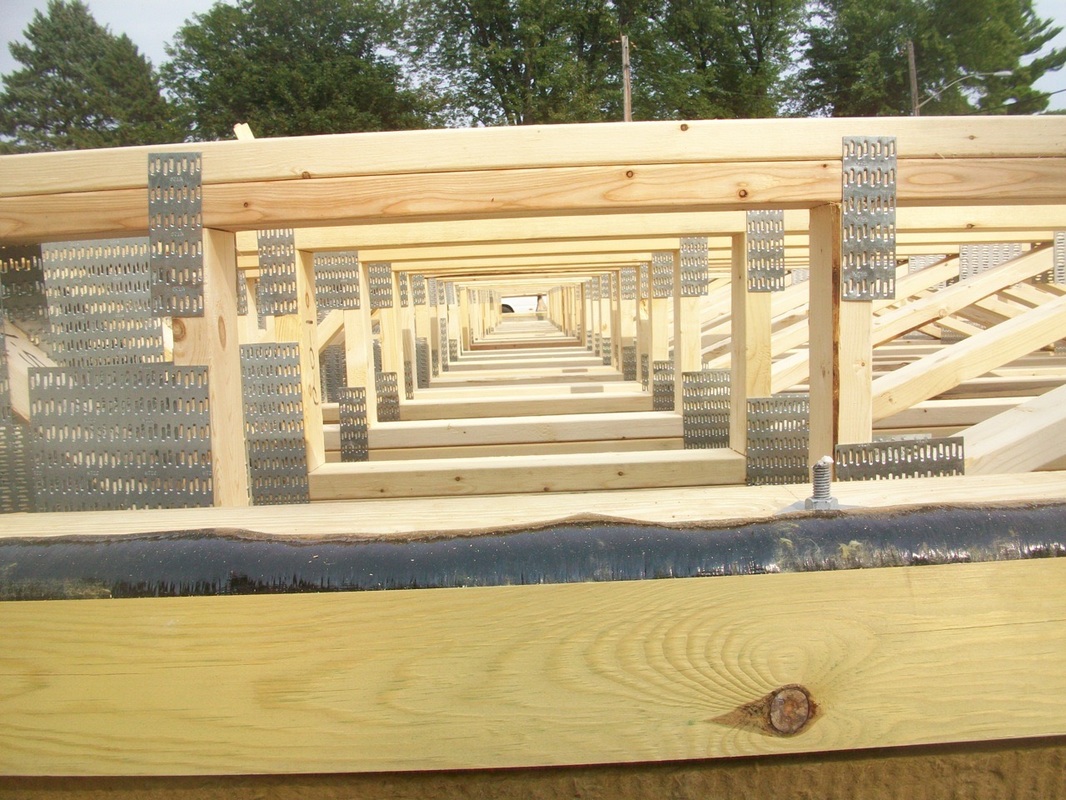
It was a very good week! The slides above show how much the look of the house changed over a single week. Interior support walls are being raised and the floor trusses are all in place. You may also note the trusses seem to hang over the basement walls in the above photos. This is no optical illusion, they really do extend out a few feet. The main reason we did this is that we wanted to build a house in which we could live on the main floor. As we age, if we find the stairs more difficult to manage, we have everything we need to enjoy life upstairs. As such, we have a cantilever extending a few feet to give us a bit more square footage upstairs than down. The insulation around that will need careful attention, but is nothing insurmountable. As a side benefit, it actually is more structurally sound! With additional weight over the "edge" of the lower level wall, the weight of the first floor is better distributed. The floor trusses were a very interesting process. Each one can be slightly, or more than slightly different. Each one is labeled and the blueprints show the exact placement of each one. You can see them labeled in the image below (and no, they are not in numeric order). It is times like this that I appreciate the care and focus of the framers, as well as our builder and designer more than ever. I know I certainly would not have managed to get them in the right order! Right next to that you can see the trusses lined up to provide the duct chase.
Meanwhile, downstairs, you can now see where our future stairs will be!  Stairs! Steps not included ;o) This next week work on the walls will continue. I'm working the Minnesota State Fair in the Eco Experience building (talking to people about our experiences with electric cars).
So the next blog may be a bit delayed, or short. We will see how this introvert handles the Fair this year;-) |